Background
Recently, we were faced with a client that allowed external RDP access to a server that was ultimately compromised via weak credentials. The attackers dropped a newer ransomware variant within the environment and attempted to propagate the malicious executable throughout the domain via PsExec. The executable in question was 'hc7.exe' which appeared to have encrypted a large amount of data within the environment as well as executables on multiple machines. We were able to successfully decrypt the required data using the techniques listed. For those that would like to attempt the same, note that installation of Volatility may not be required as you will see below.
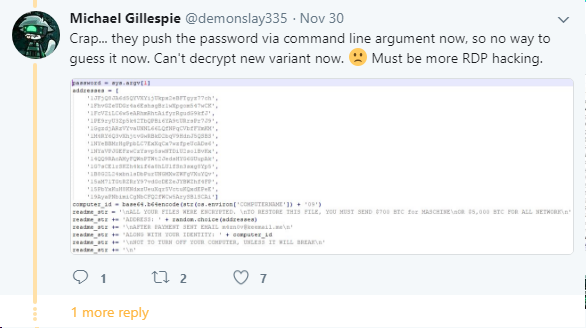
After doing some basic research, we found a series of posts from Michael Gillespie referencing potential similarities to another variant (hc6). In the past, we spoke with Michael and Fabian Wosar of Emsisoft about a ransomware incident and they continue to provide us with incredibly useful information in these situations (see our previous post about decrypting the NegozI ransomware here). While Michael released an application from his research to decrypt the hc6 variant, it seemed that hc7.exe was a modified executable that utilized a supplied user argument for the password instead of the previously hardcoded value in hc6.
Snapshoting Memory
As a self-taken reactionary measure, the customer we were working with shut down numerous machines to attempt to stop the spread of the ransomware. Luckily, one machine was left in a powered on and untouched state. With that in mind, we immediately worked to acquire a dump of the machine's memory state for offline analysis while our team could proceed with containment and recovery steps.
To begin, we utilized the Magnet Forensics RAM Capture utility to write a copy of the affected Windows 10 workstation's memory to disk. While a variety of utilities exist to dump the RAM from a Windows machine, we have had good experiences with the range of support from the Magnet utility so far.
Before dumping the contents of RAM to disk, be sure there is adequate disk space available proportionate to the size of the machine's physical RAM when selecting an output destination. In this case, the workstation had 8GB of physical RAM with adequate local storage for the resulting 8GB raw output. While the Magnet utility provides a graphical interface (with a corresponding blog post here), we prefer to utilize the command line in most cases as we tend to operate remotely and prefer to script against everything.

In this particular incident, we were working with the client remotely and would need to transfer the file to analyze the memory contents in our environment. If you require the file to be sent over a slow link, compressing the file will significantly reduce the size for faster transfer. In this particular case, 7zip cut the size of the file in half to 4GB and saved us valuable time.

Searching for Encryption Keys
Once we transferred the file back, we extracted the contents to disk and began our analysis using Volatility. If you are unfamiliar with the Volatility framework, it is an excellent memory forensics toolkit built to extract useful information from the memory of a variety of operating systems. See here for instructions on installing volatility. Additionally, the command reference sheet for Volatility is available here. While Volatility can be installed on any number of operating systems, we prefer to use it in a Linux environment for the ability to grep our output.
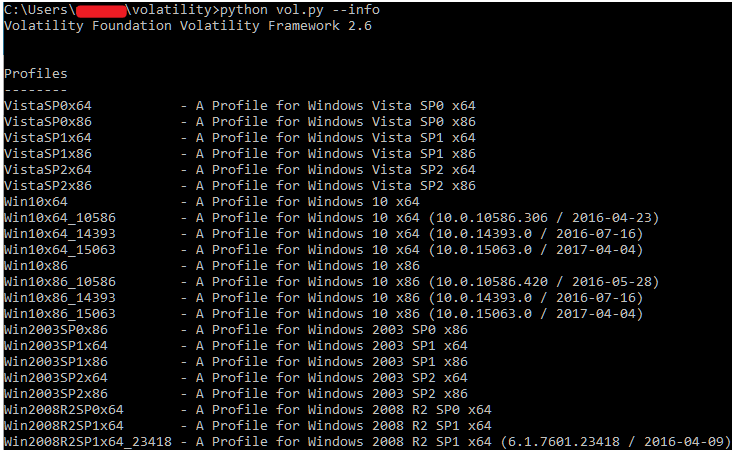
To begin, identify the exact operating system version and build number of the machine you acquired the RAM image from by typing 'ver' at a command prompt. In this particular instance, we were working with a Windows 10 x64 machine running build 15063. This is important because you must feed Volatility the appropriate profile relative to the raw capture to receive any valid output. If you are ever working in Volatility and it seems to hang for a very long time (or throws an error), check to ensure you have specified the appropriate profile. To view a list, use the --info switch.
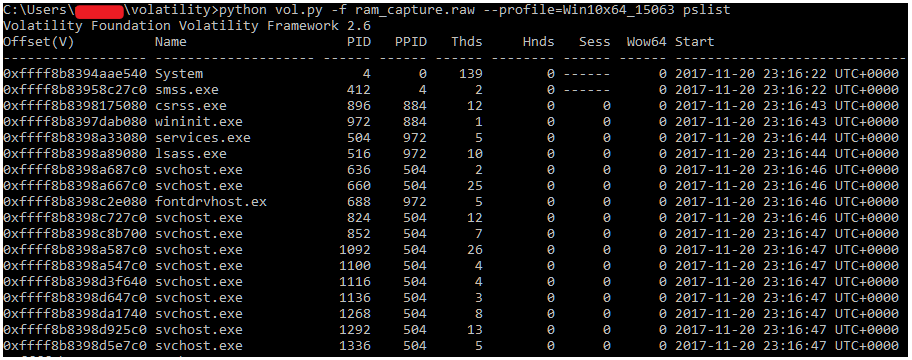
To verify Volatility is working properly, we like to use a basic command to ensure data is being parsed out appropriately from the memory image. To do this, we simply check to ensure we can view the process list from the machine.
Usually, Volatility's built in modules such as 'cmdscan' or 'consoles' would yield the information we are looking for (a user supplied password via the command line). In this case, we weren't able to find the command via either method. Instead, we chose to extract the strings held within the RAM capture to be able to search it for more information. To do this, we utilize the Sysinternals Tool 'strings.exe' application to write the raw strings data out to a text file.

In our case, we first utilized the 'strings' plugin within Volatility to convert the data into something more relevant. To do so, the ram_strings.txt file is fed into Volatility using the 'strings' module to map data to specific memory addresses for the operating system. While this step is likely not necessary to obtain the password for the hc7 ransomware, it is shown below for completeness. In a normal forensic investigation, this is a common method to be able to obtain strings output that is greppable.

We later found that the strings conversion process in Volatility was not necessary. In this case and that the password could be extracted from the RAM capture using strings.exe directly. Once the file is written out to disk, you can simply perform a findstr against the text file with a relevant term and hope for an easy win. After searching for 'psexesvc', we found a match that appeared to be the appropriate password as shown below.
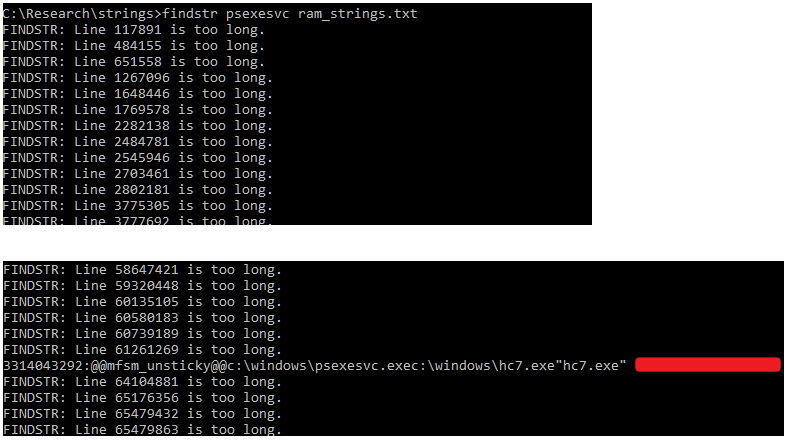
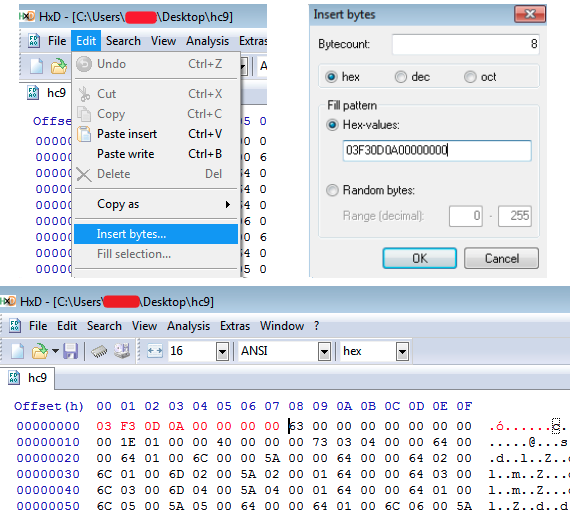
The redacted command line password above was clearly an entered password as it contained characteristics specific to the customer's name. At this point we were confident that with further work we could likely decrypt the data. We began by attempting to decompile the hc7.exe PyInstaller package. We used pyinstxtractor to extract the packaged contents of the bundled executable, but ran into trouble decompiling the main 'hc9' script within. We reached out to Michael Gillespie who experienced a similar issue working with the hc6 variant. Michael pointed us in the right direction of a tutorial written by 0xec_ who provided us with the step necessary to inject the Python 2.7 magic header into the executable.
Decryption
We then read 0xec's blog post on reversing hc6 here and were able to mimic the findings. Using HxD, we injected the relevant bytes to the beginning of the file and properly decompiled it using pycdc. We quickly reviewed the code and, as suspected, it was extremely similar. Luckily, the attackers left a function in the hc6 variant which did all of the work for us. We simply created a quick script based upon the previously known decrypt function mentioned in 0xec's blog, supplied the password we recovered from RAM, and successfully decrypted a file.
from Crypto.Hash import SHA256
from Crypto.Cipher import AES
import os
import random
import sys
import base64

FILE_EXTENSION = '.GOTYA'

def getDigest(password):
   hasher = SHA256.new(password)
   return hasher.digest()

def decrypt(key, FileName):
   OutputFile = os.path.join(os.path.dirname(FileName), os.path.basename(FileName.replace(FILE_EXTENSION, '')))
   chunkS = 65536
   with open(FileName, 'rb') as infile:
       fileS = infile.read(16)
       IniVect = infile.read(16)
       decryptor = AES.new(key, AES.MODE_CBC, IniVect)
       with open(OutputFile, 'wb') as outfile:
           while True:
               chunk = infile.read(chunkS)
               if len(chunk) == 0:
                   break
               outfile.write(decryptor.decrypt(chunk))
           outfile.truncate(int(fileS))


def run_decrypt():
   if len(sys.argv) < 3:
       print('Error')
       sys.exit(0)
   password = sys.argv[1]
   filename = sys.argv[2]
   decrypt(getDigest(password), filename)

if __name__ == "__main__":
   run_decrypt()
As always, thanks to demonslay335 for his prior research and help and to 0xec_ for the useful blog post on reversing the hc6 variant. For those that are affected and can successfully mimic the above methods, @demonslay335 has updated his hc6 decrypter to allow a user supplied password found here.